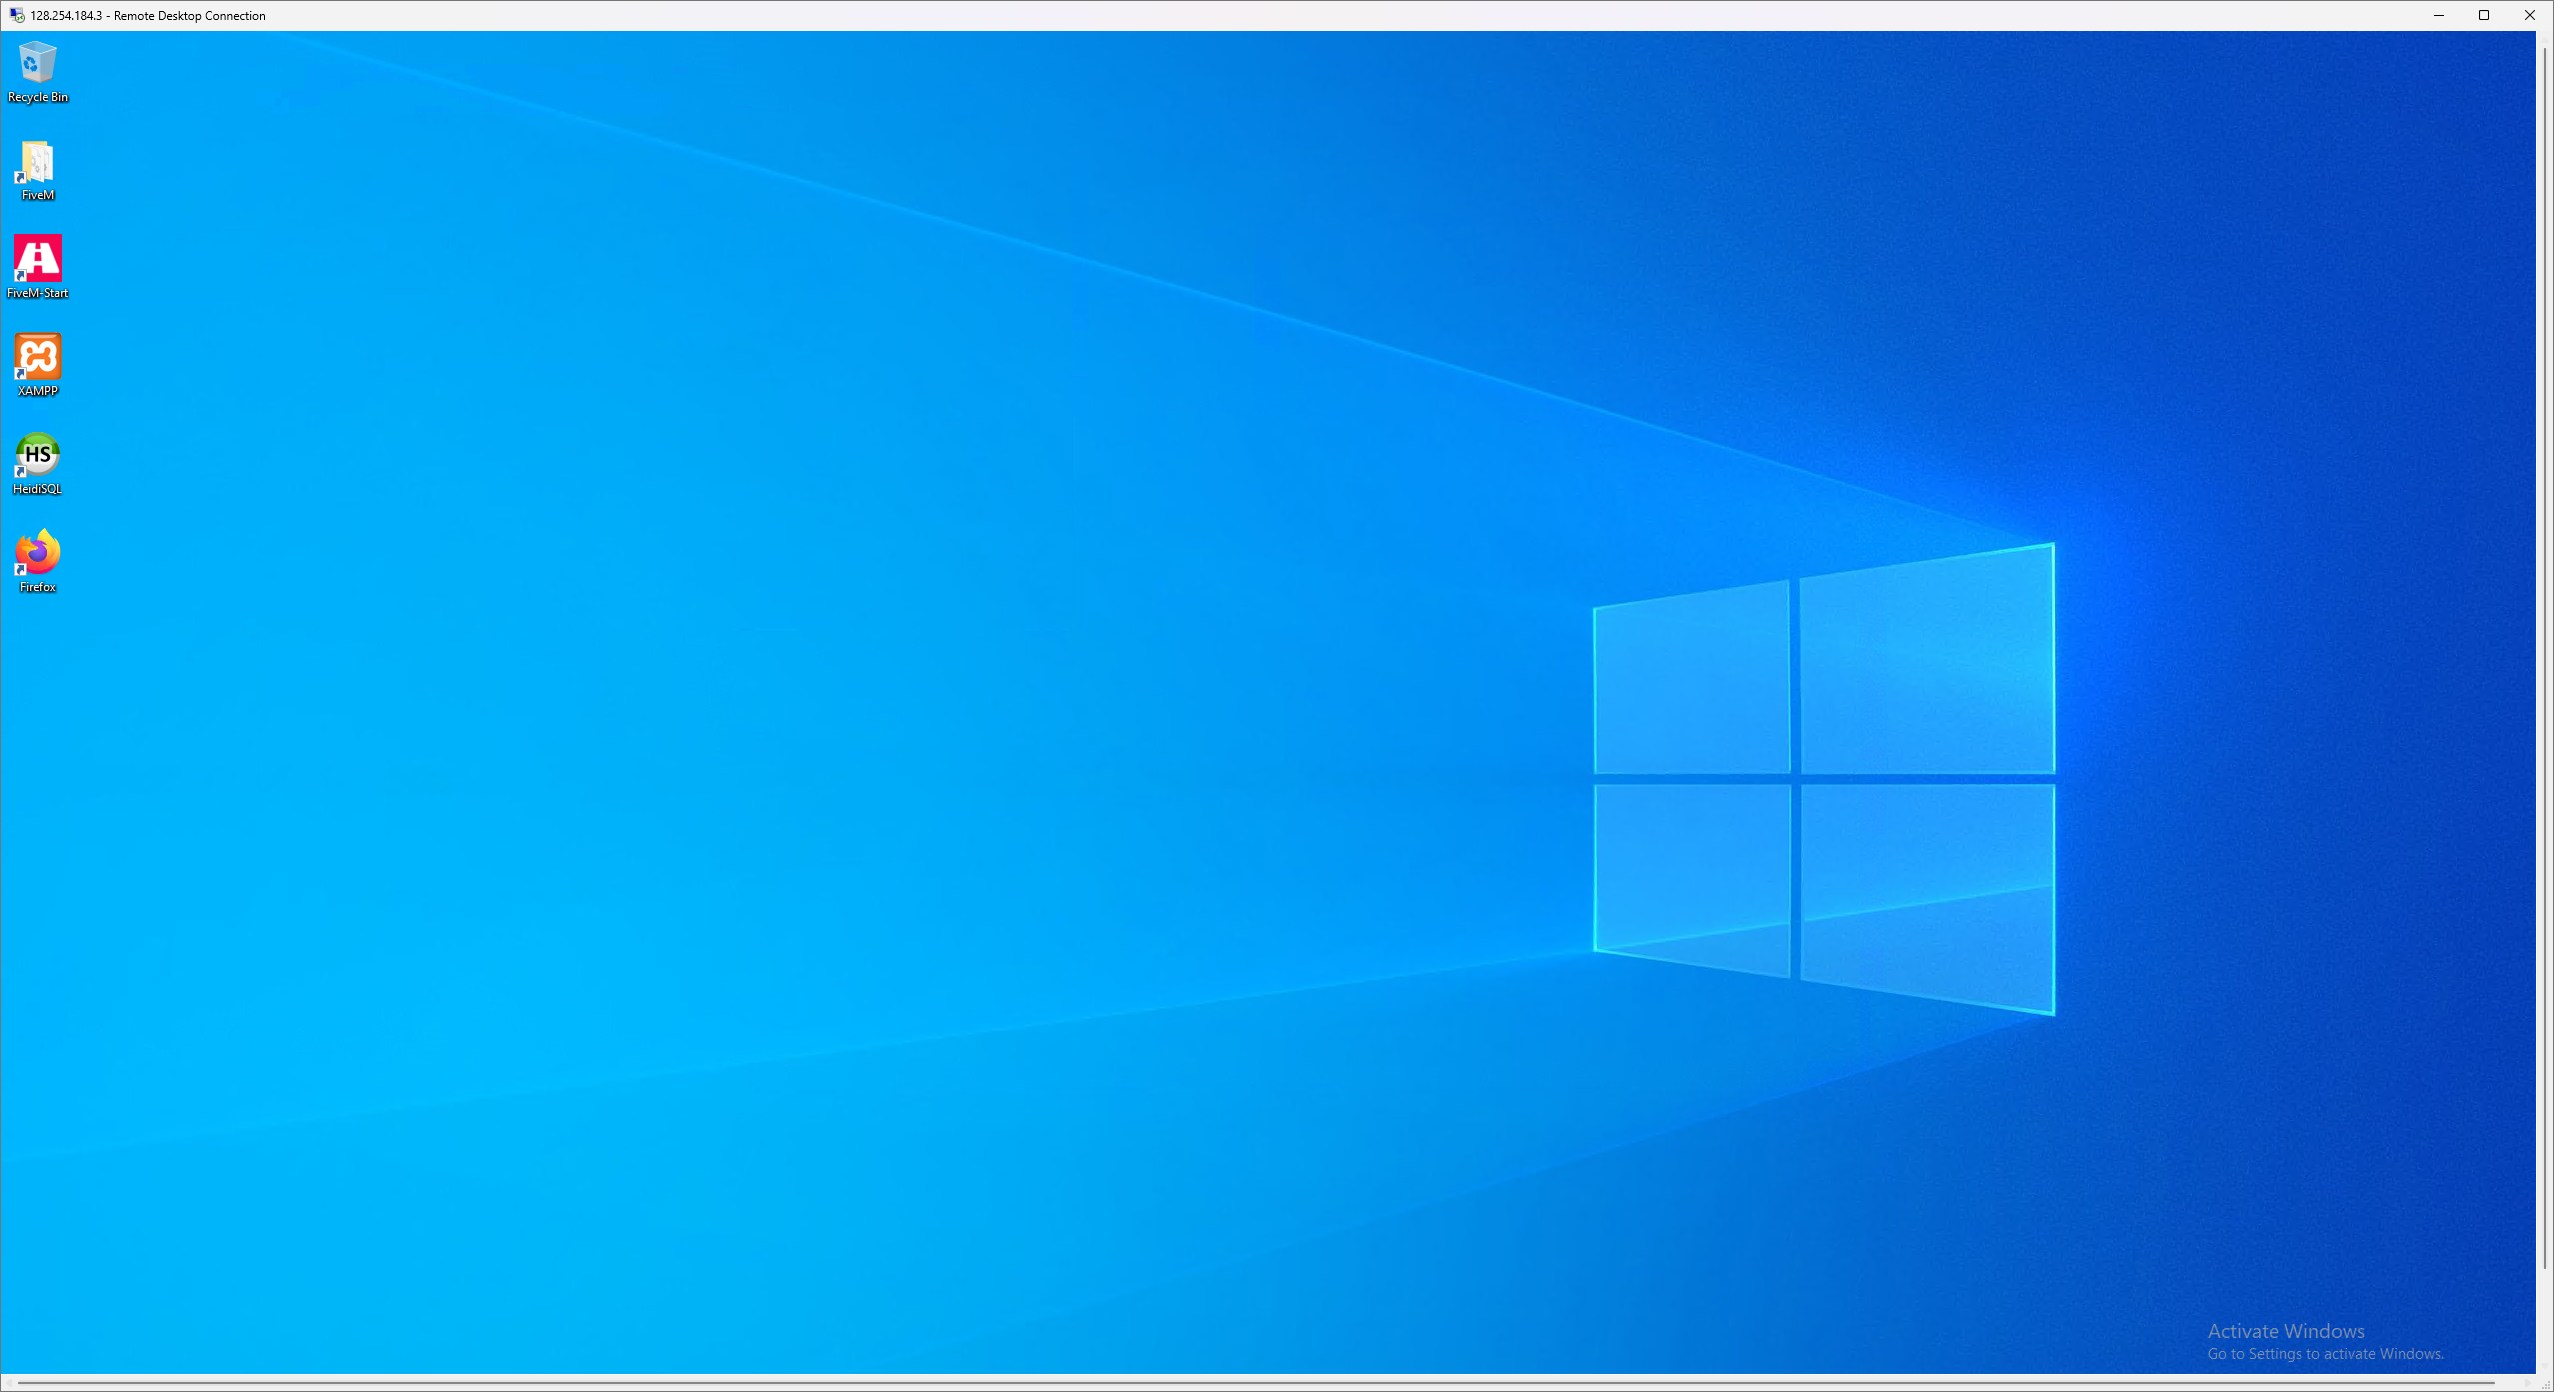

How to connect to your Windows VPS
This guide will show you how you can connect to your Windows VPS
Depending on your operating system there are a few different ways to connect to your Windows VPS (all simple thankfully). This guide will only cover how to connect to your Windows VPS from a Windows PC.
If you have a mac or would like to connect from your phone you'll need the Windows app.
On Windows
Windows PCs natively have remote desktop built in to every install. Follow these steps to connect to your VPS:
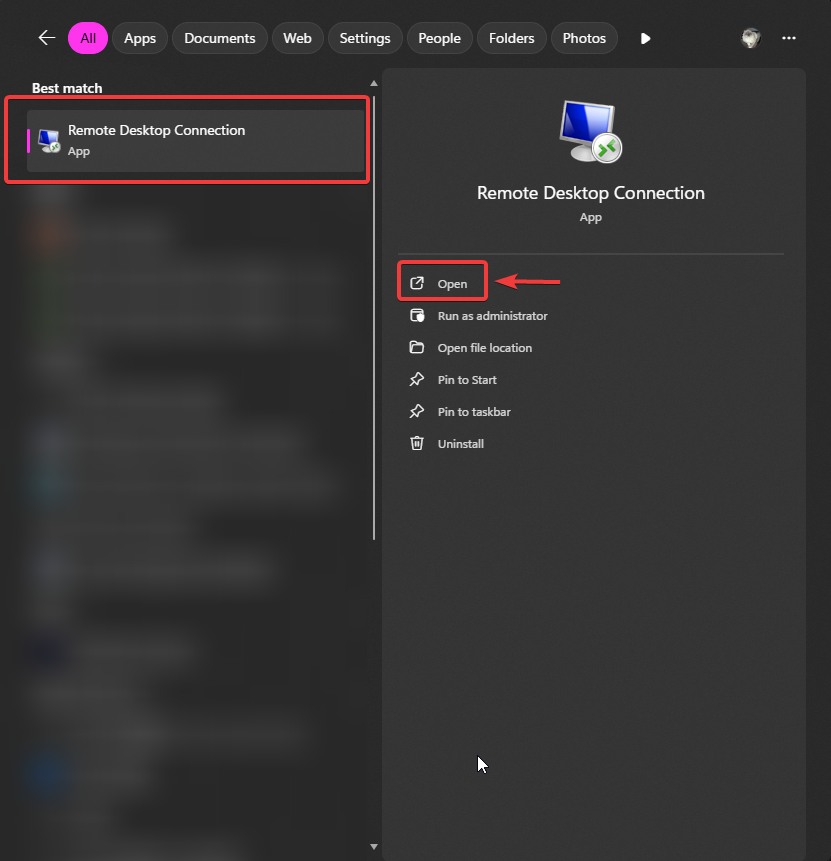
Open Remote desktop
On your desktop click the windows button and search for Remote Desktop Connection
On Remote Desktop
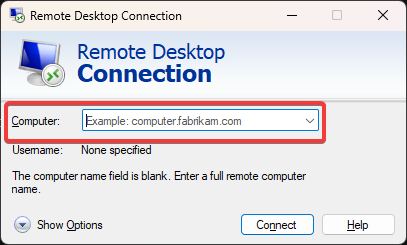
Once Remote Desktop Connection (RDC) is opened It'll ask you to input your VPS IP in the Computer field:
Finding your VPS IP
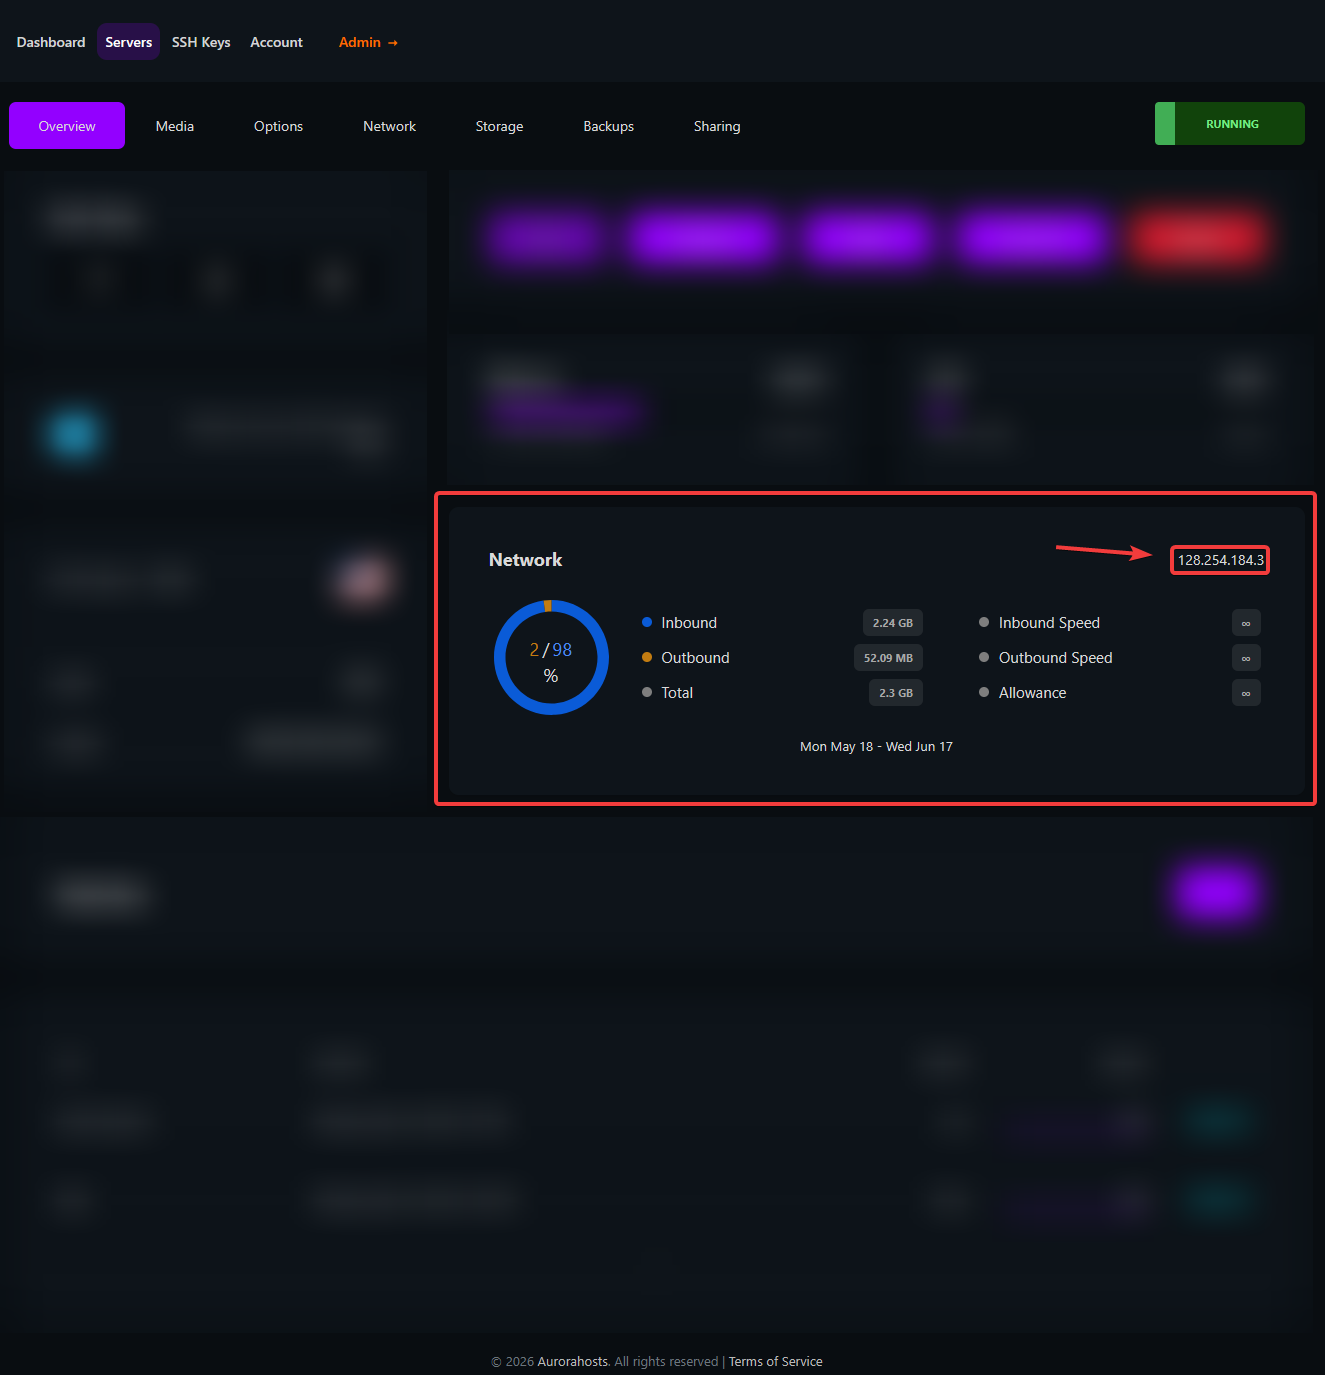
You can find your VPS IP in the email you get after you build your VPS, If you haven't built your VPS follow this guide. Otherwise your VPS IP is always visible via the VPS control panel
Credentials
Once you have your VPS IP and you input it into RDC click connect, you'll now be asked for the VPS password. By default it'll try and use your microsoft credentials, we don't want to use that. Click More choices then click Use a different account
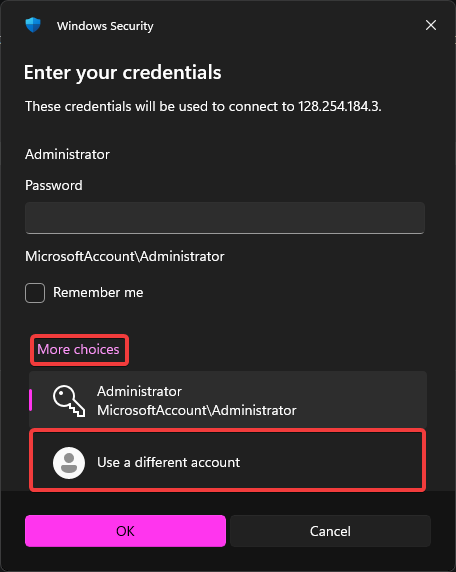
Entering your credentials
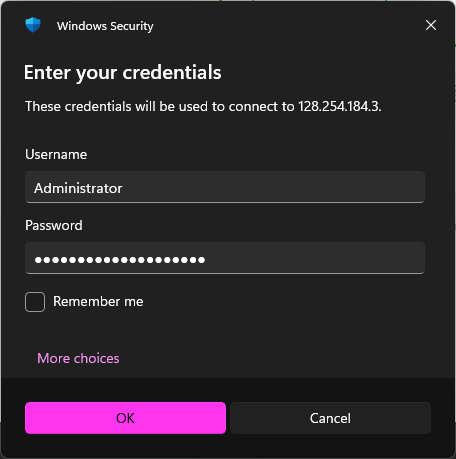
By default the Windows server username is Administrator, this is also shown in the email you get after you built your VPS. With the username entered all that's left is to enter your password which is also found in the same email you get after you build your VPS
Once both are entered, click OK
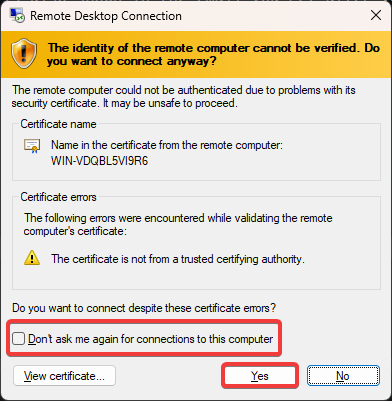
Accepting the certificate
If you entered your username and password correctly a pop up to accept the certificate will appear, this pop up will appear every time you connect to your VPS if you want to avoid this click Don't ask me again for connections to this computer then click Yes
Done!
We're now done! You should now be connected to your Windows VPS